Showing posts with label Great Friend. Show all posts

Tuesday, October 6, 2009

Candy Corn Treat

You may remember this post where I told you about my aunt who recently found out she has cancer on her spine. Well, my mom and I went to visit her in Ohio this past weekend and I took this little gift for her. The template is the same one I used for the box in this post and an PDF for how to make it can be found through Papertrey Ink. The pumpkins were made using the Coluzzle and Large Oval Punches along with a little sponging to give it some depth. The stem was hand cut and the little green strip was rolled around a pencil to form the curling effect. The sentiment was tied onto the Pumpkin Pie ribbon with twine and was punched out using the Large Oval Punch and the Scalloped Oval Punch.

Stamps: Great Friend
Paper: Natural Ivory, Kraft, Pumpkin Pie, Chocolate Chip, Old Olive
Ink: Pumpkin Pie
Accessories: Large Oval Punch, Scalloped Oval Punch, Pumpkin Pie Ribbon, Old Olive Striped Ribbon, Twine

Sunday, August 16, 2009

Fun & Fast Notes Gift Box

One of my co-workers asked me to make a box of cards for a girl she knows who is going off to college. She is also the same person I made the Lovely as a Tree and Bella Rose stationary boxes for. I was thrilled when she asked for another one :) This time I decided to make the A2 card box I have been making recently. I also cased myself for the cards and use the shadow box technique I used for my aunt's get well card. The funny thing is that when I case something, I do it from memory. So my second version always turns out slightly different than the original. I also made the box to match the cards. The top was made from Ruby Red and the bottom (which you can't see in the picture) is Kraft).

There are six cards and envelopes inside the box and although there are two of each image, all of the sentiments are for a different occasion (with the exception of the birthday cakes--although I did use two different birthday greetings). Each also has a different textured background thanks to my Big Shot and Texture Plates, however, it's hard to see from the picture.
Also, on a different note...I heard back from Tenny about how my cards and Post It holders were doing at his store and he said that six out of the eight Post It's have sold and there has been interest in my card boxes, however, they haven't yet. I was thrilled that anything sold! I will keep you all posted :)

Stamps: Fun & Fast Notes, Sweet Little Sentiments, Crazy for Cupcakes, Teeny Tiny Wishes, Great Friend
Paper: Ballet Blue, Ruby Red, Mellow Moss, Chocolate Chip, Regal Rose, So Saffron (and coordinating DSP for all colors), Whisper White, Kraft
Ink: Basic Black
Accessories: Big Shot, Texture Plates, Large Oval and Scalloped Oval Punch, Eyelet Border Punch, SU Markers, Twine, Dimentionals

Sunday, August 2, 2009

Antique Store Set #3

Today was a very busy day! I was going to wait and post these tomorrow, but I was so excited to show them to you all :) The last time Joe and I were at Market Place on Main, we noticed that Tenny, the owner, had a huge basket of Post-It note holders. Joe picked one up and said "you can make these!!" Tenny heard him and said they sold pretty well. So I decided to make a group of Post-It note holders to take down with my card sets. I used the same template from these monogram Post-It note holders I made for the staff at the Y.

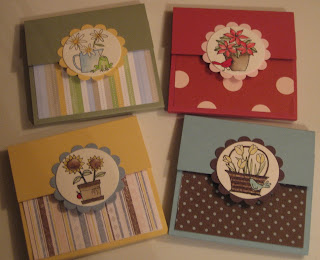
The first set I did using In Colors (well, and Green Galore since there isn't a green In Color) as well as my Big Shot with Texture Plates and Great Friend Stamp set. It's hard to tell from the picture, but each holder is embossed using a different Texture Plate. You can see a closer picture here on SCS.
Although, when I saw these Post-It notes at Wal-Mart, I immediately thought of the Soft Subtles color family, I think they also work well paired with these colors too :)
The second set was made with the A Flower for All Seasons stamp set, Designer Series Paper, and watercolor paper.
I also started another card set this evening of onsie cards like to these. I will post it tomorrow once it's all finished.

Saturday, August 1, 2009

Antique Store Set #1

You may remember a few days ago I told you about an opportunity I have to sell my cards at a local antique store. I'm going to take 2 or 3 sets down, some candles, post it holders, and a few individual cards. This is the first set that I made. It's a case of this post. I changed the size of the squares to 3 inches and 3 1/4 inches and didn't pierce the mat, but for the most part it's the same. I also used the new In Colors, which I love, love, love! :)

The box was used following this template on Splitcoaststampers. It has a Kraft base and an acetate lid. At first, I wasn't sure about putting ribbon on the outside because you could see the ribbon on the cards inside, but the more I looked at it, I changed my mind. Look for more to come soon!
Stamps: Friends 24-7, Lots of Thoughts, Great Friend
Paper: Kraft, Melon Mambo, Rich Razzleberry, Bermuda Bay, Crushed Curry, Whisper White
Ink: Chocolate Chip
Accessories: SU Markers, Scalloped Oval and Large Oval Punch, Chocolate Chip Ribbon

Monday, July 20, 2009

Granola Bar Treats

I'm having a staff meeting tomorrow for my Group Exercise instructors and wanted to give them a small snack to have during our meeting. I immediately thought of granola bars...but I couldn't simply just give them a plain g-bar (as Joe and I call them). Here is what I am taking to the meeting tomorrow:

Surprisingly, these didn't take long to make at all. In fact I made all 20 in less than an hour and a half. The most time consuming part was cutting out all of the butterflies. I'm really pleased with how they turned out. At first I was going to use some retired DSP, but Razzleberry Lemonade was too tempting and I caved!

Stamps: Great Friend
Paper: Whisper White, Rich Razzleberry Cardstock, and Razzleberry Lemonade DSP
Ink: Melon Mambo, Rich Razzleberry
Accessories: 1 3/8 and Scalloped Circle Punch, Polka Dot Ribbon

1. Cut DSP to 4 x 4 1/4 and wrap around bar (long side is the length)
2. Stamp butterfly onto scrap piece of Whisper White using Melon Mambo and cut out. Adhere to 1 3/8 Whisper White Circle. Adhere that piece to Scalloped Circle punched from Rich Razzleberry.
3. Stamp sentiment over butterfly using Rich Razzleberry ink.
4. Adhere to center of bar.
5. Tie Polka Dot Ribbon around top of the bar.

And voila! Super easy! These could also be done with candy bars, rice crispy treats, etc!

Wednesday, June 17, 2009

Lovely As A Tree Stationary Box

As promised...here is the completed Stationary Box for a boy. I'm really excited with how it turned out. While the faux stitching took FOREVER (just like cutting all the roses on the Bella Rose box), I think it really makes this set! The distressed look was created by running my finger nail down the edges of every layer. I was very excited that this set made it to the new catalog (even though it's not mine haha)...speaking of the new catalog. I saw it last night at Roberta's house and OMG you're going to die when you see the new stuff! I'm going to be so poor ;)

Anyway...here are the photos. Let me know what you think!

Closed

Open

Mini composition book
Two of the four cards

The grass is brayered and the clouds were sponged using a scalloped circle punch as a template

The other two cards

Bookmark

Post it Note Holder
Stamps: Lovely As A Tree, Great Friend, Sweet Little Sentiments, Sanded Background
Paper: Baja Breeze, Chocolate Chip, Parisian Breeze DSP
Ink: Chocolate Chip, Baja Breeze, Old Olive
Accessories: Mat Pack and Paper Piercer, SU Chocolate Chip Marker and White Gel Pen, Twine, Buttons

How Many M&M's?

I'm going to be using this at the party I'm doing this weekend. I'm not sure what the prize is going to be for the person who guesses closest, but it will most likely be either Stampin' Up product or a gift certificate. We have a whole case of these frap bottles from Costco so I can't wait to make more fun things with them! As you can see I caught the Summer Love color scheme bug again! haha I figured it will be a nice example of how the DSP, rub ons, and Great Friend stamp set coordinate. It's hard to tell, but there is a piece of Baja Breeze ribbon wrapped around the center (the oval is covering it in the picture).
Stamps: Great Friend
Paper: Baja Breeze, Kiwi Kiss, Whisper White, Walk in the Park DSP
Ink: Cameo Coral
Accessories: Summer Love Rub Ons, Scalloped Oval Punch, Coluzzle, 1 3/8, 1 1/2, and Scalloped Circle Punches

Sunday, June 14, 2009

Bella Rose Stationary Box

You may remember this post of the Stationary Box I made for our Administrative Assistant at work. After seeing it, one of my co-workers asked if I would make her two to give to kids she knows that are going off to college. This is the first one I made. All the embellishments were made by cutting roses from the design in the Bella Rose Designer Series Paper. Surprisingly, one sheet of the rose design is all it took to make the box and it's contents (with each rose having two layers), however, it was very time consuming. I am very pleased with the outcome, though, so it was well worth it! The second one is for a boy, so that one might be a little more challenging. I'll post it when it's finished.

Let me know what you think!

The outside

Opened up

Two of each design for a total of 4 cards and envelopes


Mini composition book

Two bookmarks

Post-It Holder
(Tutorial can be found here)
Stamps: Sweet Little Sentiments, Great Friend
Paper: Chocolate Chip, Riding Hood Red, Pink Pirouette, Whisper White Cardstock and Bella Rose DSP
Ink: Chocolate Chip
Accessories: Big Shot; Scallop #2 Die; Colluzle; Ribbon, 1 3/8, 1 1/2 and Scalloped Circle Punch; Dimentionals 

Monday, June 8, 2009

Hostess Favors

Hi All! Sorry I've been so inconsistent recently. Joe and I have been doing A LOT of work in our backyard...so that has sort of hindered my stamping time! My post for today shows two little goodie bags I'm going to be using for a party I have on the 20th. I'm most likely going to give one to the hostess and raffle the other one off as a door prize. I might also make a post it note holder to match and throw that in. 

Both bags contain a mini note kit which has two stamps, a Chocolate Chip Stampin' Spot, 4 notecards, and 4 envelopes. Both of these sets are on the Last Chance list, so make sure to place an order before the end of the month if you are interested in these kits. The tags were made using the Great Friend stamp set (I haven't used it in a while so I didn't feel bad posting yet another project with it). The colors are Bordering Blue with Pink Pirouette and Kiwi Kiss with Baja Breeze. I am working on some wedding invitations and a few card sets right now...so watch for them soon! 

Sunday, May 17, 2009

Kiwi Kiss Fry Box

This is one of the projects I will be demo-ing at the party I have this coming weekend. I used the template from Stampin' Up's demonstrator site and cut it out using Kiwi Kiss. It was super simple and took max 10 minutes once I figured out what I wanted it to look like (that's always the hardest part!) I will definitely be making these again!! It is filled with six wrapped Hershey's mini candy bars and some crinkled Designer Series Paper to match.

Stamps: Great Friend
Paper: Kiwi Kiss, Basic Gray, Bashful Blue, Walk in the Park DSP
Ink: Basic Gray
Accessories: Ribbon, 1 3/8 inch Circle, 1 1/2 inch Circle, and Scalloped Circle Punches, Twine, Cello Bag

Thursday, May 14, 2009

Clean and Simple Cards

Recently I've been taking a liking to clean and simple cards. At first it was hard for me to imagine not bombarding a card with various papers and embellishments, but I had to try one...which turned into two! Plus I was really enjoying playing with my markers!

For this first card I basically copied myself only with different colors and used markers instead of pastels...And of course used Flower Fancy! I really need a new flower stamp set!

Stamps: Flower Fancy, Great Friend
Paper: Whisper White, Perfect Plum Cardstock
Ink: Chocolate Chip, Certainly Celery
Acessories: SU Markers, Eyelet Punch

1. Score a 4 1/4 x 11 piece of Whisper White at 5 1/2 and fold on the score line.
2. Cut a 4 1/4 x 2 1/4 strip of Whisper White. Use Certainly Celery, Perfect Plum, and Apricot Appeal markers to color the solid stamp from Flower Fancy and stamp it twice on the strip so that the second image is lighter than the first. Use Chocolate Chip ink to stamp the detail.
3. Use the Eyelet Punch along the bottom of a 4 1/4 x 3 1/2 piece of Perfect Plum and adhere the Whisper White strip to the center. Adhere to card front.
4. Stamp greeting from Great Friend in Certainly Celery. Use Perfect Plum marker to go over the word "friend" and stamp below image.

For the second card I decided to use my Crazy for Cupcakes and Sweet Always DSP since I hadn't used it in a while. I also used the Celebrations stamp that I earned through the Get Connected Promotion in March. 

Stamps: Crazy for Cupcakes, Celebrations
Paper: Whisper White, Chocolate Chip, Regal Rose Cardstock, Sweet Always DSP
Ink: Chocolate Chip
Acessories: Eyelet Punch, SU Markers, Stampin' Pastels, Dimensionals, Ribbon

1. Score 4 1/4 x 11 piece of Whisper White at 5 1/2 and fold on score line.
2. Stamp cupcake image onto a 1 3/4 x 3 piece of Whisper White. Color with SU markers and Stampin' Pastels.
3. Adhere to 2 x 3 1/4 piece of Regal Rose
4. Use Eyelet Punch on the bottom of a 4 1/4 x 3 piece of Chocolate Chip. Adhere piece of 4 1/4 x 2 Sweet Always DSP to center.  
5. Adhere DSP piece to cardfront.
6. Use SU Markers (Pumpkin Pie, Regal Rose, Chocolate Chip) to color directly onto Celebrations Stamp and stamp above DSP.
7. Wrap ribbon around entire card and tie to the left side of the DSP.
8. Adhere the image using dimensionals.

Friday, May 8, 2009

Happy Friday!

I was just playing around today before the girls showed up for my workshop and this is what I came up with. It's really different from the cards I usually make as it doesn't have any ribbon! I'm usually the queen of ribbon. But I really really like this one :) And to top it off, the whole thing was made from scraps! Yeah! I also have been obsessed recently with 4 1/4 square cards. I think they are the perfect size!

Stamps: Great Friend, Heard from the Heart
Paper: Basic Gray, Baja Breeze, Whisper White Cardstock, Walk in the Park Designer Series Paper
Ink: Basic Gray
Accessories: SU Markers, Dimensionals

1. Score 8 1/2 x 4 1/4 Baja Breeze at 4 1/4 and fold on score line. 
2. Cut three 1 1/4 x 4 panels of Basic Gray and three 1 1/8 x 3 7/8 of DSP. Adhere the DSP to the Basic Gray. Adhere panels to card base evenly spacing them.
3. Cut 3 1/2 square Basic Gray, 3 1/4 square Baja Breeze, and 3 inch square of Whisper White.
4. Stamp the leaves around the left side and bottom of Whisper White, stamping off twice before re-inking. 
5. Using the So Saffron SU Marker, ink up only the word "happiness" from the Heard from the Heart set. Stamp on Whisper White.
6. Ink the entire greeting with Basic Gray and stamp onto scrap piece of paper. Cut out words and adhere them around "happiness" using dimensionals cut in half. 
7. Mat the Whisper White square to Baja Breeze square and then to Basic Gray square. Adhere the entire piece to the card base.
8. Take a 1/2 x 4 strip of DSP and run it across all of the layers.
9. Stamp the butterfly twice and cut both out. Adhere together using dimensionals and then adhere to card base in upper right corner.

Saturday, May 2, 2009

May Technique Workshop Projects

These are the projects we will be making at my May 15th technique class. We will be learning how to make dahlia folded flower buds, how to rock and roll stamp, how to use rub-ons on a transparency card, and how to make the "sour cream" treat container. I am super excited about all of these projects! I had originally planned on using more rub-ons for these, but since I only had one person order them ahead of time (and then we found out they were on back order) I decided to only use them as accents so that I would have enough for everyone. As always, my favorite project is the treat container! Wait until you see how easy it is to make :)

Thursday, April 30, 2009

Another Flower Fancy Mother's Day

This is the fourth in my set of Mother's Day cards...it was very easy and fun to make! It's hard to tell from the picture, but it also uses vellum like two of the other ones in the set. I am still working on cards for my May 15th technique class as well as a project for my mom for Mother's Day, so I will have pictures of those projects soon! 

Stamps: Flower Fancy, Great Friend
Paper: Perfect Plum, Baja Breeze, Natural Ivory Cardstock
Ink: Basic Gray, Baja Breeze, Old Olive
Accessories: Vellum, Brads, Twine, Stampin' Pastels, Blender Pens

1. Score 8 1/2 x 5 1/2 piece of Perfect Plum at 4 1/4 and fold on score line.
2. Cut Baja Breeze to 5 1/4 x 4.
3. Cut both Natural Ivory cardstock and vellum to 5 1/4 x 2 and tear together.
4. Stamp the small flower image three times down the Natural Ivory in Baja Breeze ink. Use Old Olive to stamp the leaves.
5. Lay the vellum over the stamped flowers and punch a hole in each corner. Attach with brads.
6. Using Basic Gray ink, stamp the detail for the flower and leaves on the vellum, over the flowers. Heat set to dry.
7. Stamp the flower with stems detail on the right side of the Baja Breeze. Stamp two more times on scrap pieces of Natural Ivory. Color just the flowers (one with Baja Breeze and the other with Perfect Plum) using Stampin' Pastels and blender pens. Cut out and attach. Color the leaves with Old Olive.
8. Stamp outline and sentiment from Great Friend onto Natural Ivory and cut out along inner dotted line. Stamp outline again on scrap piece of Perfect Plum and cut along outer solid line. Adhere together.
9. Adhere vellum layer and sentiment to Baja Breeze.
10. Wrap a long piece of twine several times around Baja Breeze layer and tie on the left side. Adhere to Perfect Plum card base.

Monday, April 27, 2009

Vellum Spotlight with "Rock & Roll" Butterfly

Well, I decided to fix this one up so that I could share it with you tonight. At first I had just punched the hole in the vellum and the spotlight effect wasn't as dramatic as I was hoping. I really didn't realize that until I went to photograph it and the spotlight didn't show up. I originally was just going to re-do it using vellum the whole way across, getting rid of the spotlight technique, but I'm really glad I decided to put a scallop around it instead because it really makes the spotlight stand out! I wish I had saved the "before" pictures so you could see what I mean.

Anyway, this is the second of my Mother's Day cards. I've actually decided to re-create the "For You" card with the Flowers in Silhouette stamp that I made a few days ago as the third in the set, so I only have one more to go!


Stamps: Great Friend
Paper: Basic Gray, Whisper White, Baja Breeze Cardstock
Ink: Basic Gray, Baja Breeze, Old Olive
Accessories: Vellum, Summer Love Rub Ons, Baja Breeze Striped Ribbon, Twine, 1 3/8 Circle Punch, Scalloped Circle Punch, Corner Rounder Punch

1. Score 4 1/4 x 11 piece of Basic Gray at 5 1/2 and fold on score line.
2. Stamp stems and butterflies on 4 x 5 1/4 piece of Whisper White. The stems are stamped in Old Olive (stamping twice before re-inking) and the butterflies are Basic Gray and Baja Breeze.
3. Cut a piece of vellum to 4 x 5 1/4. Lay over Whisper White to decide where you want to punch your hole for the spotlight effect. Line up your 1 3/8 circle punch and then remove the Whisper White so you are only punching out the vellum.
4. Punch out a scalloped circle ring from Baja Breeze by punching a 1 3/8 circle and then lining the scalloped punch over the punched out hole. Adhere scallop to vellum.
5. Tie knot in Baja Breeze ribbon and adhere around vellum and Whisper White. I also took a small small SMALL amount of Tombow adhesive and dabbed it in the corners to help hold the vellum in place. If you use too much, you can see it, so be cautious.
6. Adhere Whisper White/vellum piece to card base.
7. Ink the butterfly with Baja Breeze and then lightly roll the edges of the stamp in Basic Gray for the rock and roll effect. Stamp the butterfly onto scratch piece of Whisper White. Cut out and adhere to vellum, only placing adhesive down the center so the wings can "fly".
8. Stamp sentiment onto scratch piece of Whisper White and trim down so that it is the size you want. Use corner rounder to round corners. Punch hole in upper left corner.
9. Cut out two of the flowers from the Summer Love Rub Ons and apply to your "tag"
10. Thread twine through hole and tie it around the knot of the Baja Breeze ribbon. Snip off the excess.

I also think I'm going to make this card for my technique workshop on the 15th...depends on what other creations I can come up with. I just like how many techniques you can show with one card....so this could be a sneak peek! :) 

Found It!

Phew! I think I redeemed myself from last night's stamping nightmare. And it was all because Kim, one of my customers and fellow YMCA employee, stopped by to see me today and gave me some of her old cardmaking magazines. I took a peek at one while I ate my lunch and saw a card made with vellum. I've never really experimented with it and actually forgot that I had bought a piece a few months ago. I decided that's what I was going to use on my cards and I busted out two cards in about an hour and half! I'm only sharing one with you today because as I was getting ready to take a picture of the second one I realized I want to change one thing...and I've already put everything away (see how much I miss my attic stamping room!! haha). But I did use my trusty Flower Fancy set just like I said! :) I also used my newest favorite set Great Friend for the sentiment. I've decided it's going to be the sentiment for all of the Mother's Day cards. It felt so good to look at my card and feel good about it...hopefully I don't have another night like last night ever again!

Stamps: Flower Fancy, Great Friend
Paper: Baja Breeze, Perfect Plum, Whisper White Cardstock; Walk in the Park DSP
Ink: Basic Gray
Accessories: Vellum, Stampin' Pastels, Blender Pens, Baja Breeze Ribbon, Brads, Eyelet Punch, Clear Embossing Powder, Embossing Gun, Dimensionals

1. Score 5 1/2 x 8 1/2 piece of Baja Breeze at 4 1/4 and fold on score line.
2. Mat 5 x 3 3/4 piece of DSP to 5 1/4 x 4 piece of Perfect Plum. 
3. Stamp flower onto vellum using Basic Gray and emboss with clear embossing powder. Color with blender pens and Stampin' Pastels. 
4. Cut to 3 x 4 1/4. Tear off bottom of vellum. Punch two holes in the top corners.
5. Lay vellum over 3 x 4 1/4 piece of Perfect Plum and punch holes through cardstock. Attach with brads.
6. Use the eyelet punch on a 4 1/4 x 1 1/2 piece of Baja Breeze and attach to Perfect Plum/vellum piece. Adhere entire piece to DSP.
7. Tie a knot in a piece of Baja Breeze striped ribbon and wrap around all the layers except the card base.
8. Stamp the sentiment and border from the Great Friend set in Basic Gray on Whisper White. Stamp small flower from Flower Fancy using Baja Breeze ink (stamp off once). Cut out at dotted line.
9. Stamp border on Baja Breeze cardstock and cut out along outer line. Adhere to Whisper White sentiment. Adhere to card using dimensionals.

Help Me Find My Mojo!

Ugh...that's all I can say about my evening of stamping last night! First off, I think my "stamping brain" was confused because I'm back to working off the dining room table instead of my little studio in the attic because of the heat, so now everything is stored away until I pull it out. I guess my creativeness works better when everything is set out where I can see it.

But I got an order for 4 Mother's Day cards yesterday, so I decided to work on those last night instead of my workshop projects since I need to get the Mother's Day cards in the mail to her by the end of the week. Well 3 hours later and this was all I came up with. I don't have any sets that say "Happy Mother's Day" so I was just sort of improvising. I decided to pull out the retired Love Ya Bunches set since I hadn't used it in a while. At first I really liked the wheelbarrow card, but now I'm not sure...that card actually came together really quick and I thought I was on a roll. But when I went to start the next card, I just kept changing my mind and running out of ideas. I wasn't leaving my table until I had SOMETHING, and this is it. It's okay, but not for Mother's Day, and definitely not one of my best...so back to the drawing board! I'm thinking about busting out my tried and true Flower Fancy set! It never lets me down!

Anyway...here are the cards. Let me know what you think...I seriously am disgusted by them! haha I'm going to hit it hard this evening, so hopefully my "Stamping Mojo" returns!

(Sentiment is from the Great Friend set)

Sorry I don't have instructions for these cards...I changed them so many times I would have to go back and re-measure everything to get the measurments. I used Sale-A-Bration DSP on both as well as Sage Shadow for the card bases.

Sunday, April 26, 2009

Great Friend

I know I said I was going to start working on workshop projects today, but I had to get this one made. This card was made for one of my really great friends at work who did an amazing job with planning our annual Healthy Kid's Day event that was held yesterday. I'm off to Jolene's here in a little, so look for an upload of our make-and-take later today!

Stamps: Great Friend
Paper: Baja Breeze, Cameo Coral, Whisper White Cardstock and Walk in the Park DSP
Ink: Baja Breeze, Basic Gray, Cameo Coral
Accessories: Eyelet Punch, Whisper White Ribbon, Twine, Dimensionals

1. Score 8 1/2 x 5 1/2 piece of Baja Breeze at 4 1/4 and fold along score line.
2. Use the Eyelet Punch on a 1 1/2 x 5 1/4 piece of Whisper White and adhere to 5 1/4 x 2 piece of DSP.
3. Tie Whisper White ribbon around DSP.
4. Stamp the butterfly from Great Friends three times in Baja Breeze. 
5. Adhere DSP to left side of card base.
6. Stamp the outline once onto Whisper White and once onto Cameo Coral using Basic Gray Ink. Stamp the sentiment onto the Whisper White piece using Cameo Coral Ink. Cut out the Cameo Coral cardstock along the outer black line and the Whisper White with the sentiment along the inner dotted line. Adhere the two together. 
7. Punch a hole in the sentiment and lace twine through. Adhere sentiment to DSP using a dimensional.
8. Loop the twine under the ribbon and tie a knot right above the punched hole. Snip off the excess so you are only left with a knot.

Friday, April 24, 2009

Flowers in Silhouette

Well it was Christmas at my house today! My newest box of SU goodies came. What all did I get?...more like what DIDN'T I get! haha I was super excited to use the eyelet punch and some of my new paper. I also got everything for my May workshops, so look for those projects within the next week or so.

This card was really easy to make and I'm really pleased with the outcome. I used the Flowers in Silhouette as well as the Great Friend (for the sentiment) Stamp Sets...both of which I got FREE! The Flowers in Silhouette is from the Get Connected Promotion and the Great Friend I got for getting a recruit during Sale-A-Bration! Gotta love SU! It's also hard to tell from this picture, but the corners of the Whisper White are pierced in a "photo corner" sort of way.

Stamps: Flowers in Silhouette, Great Friend
Ink: Bashful Blue, Basic Gray
Paper: Basic Gray, Bashful Blue, Barely Banana, Whisper White Cardstock
Accessories: Eyelet Punch, Twine, Paper Piercer 

1. Score 4 1/4 x 11 piece of Basic Gray cardstock at 5 1/2 and fold on score line.
2. Use eyelet punch on 5 1/4 x 4 piece of Barely Banana and adhere to Basic Gray.
3. Place 5 x 3 1/8 piece of Bashful Blue on top of Barely Banana.
4. Lightly sponge Bashful Blue ink over a 4 3/4 x 2 7/8 piece of Whisper White. Stamp Flowers in Silhouette stamp in Basic Gray, stamping twice before re-inking. Stamp the sentiment from Great Friend in the corner. 
5. Using your paper piercer, pierce 3 holes 1/8 of an inch apart going across and down to form "photo corners" --sorry you can't see this well in the picture.
6. Cut two pieces of twine 6 inches and wrap around Whisper White. Tie a smaller piece around the two.
7. Adhere Whisper White to Bashful Blue. 
8. The inside of the card has a 4 x 5 1/4 piece of Bashful Blue.