Thursday, April 30, 2009

Another Flower Fancy Mother's Day

This is the fourth in my set of Mother's Day cards...it was very easy and fun to make! It's hard to tell from the picture, but it also uses vellum like two of the other ones in the set. I am still working on cards for my May 15th technique class as well as a project for my mom for Mother's Day, so I will have pictures of those projects soon! 

Stamps: Flower Fancy, Great Friend
Paper: Perfect Plum, Baja Breeze, Natural Ivory Cardstock
Ink: Basic Gray, Baja Breeze, Old Olive
Accessories: Vellum, Brads, Twine, Stampin' Pastels, Blender Pens

1. Score 8 1/2 x 5 1/2 piece of Perfect Plum at 4 1/4 and fold on score line.
2. Cut Baja Breeze to 5 1/4 x 4.
3. Cut both Natural Ivory cardstock and vellum to 5 1/4 x 2 and tear together.
4. Stamp the small flower image three times down the Natural Ivory in Baja Breeze ink. Use Old Olive to stamp the leaves.
5. Lay the vellum over the stamped flowers and punch a hole in each corner. Attach with brads.
6. Using Basic Gray ink, stamp the detail for the flower and leaves on the vellum, over the flowers. Heat set to dry.
7. Stamp the flower with stems detail on the right side of the Baja Breeze. Stamp two more times on scrap pieces of Natural Ivory. Color just the flowers (one with Baja Breeze and the other with Perfect Plum) using Stampin' Pastels and blender pens. Cut out and attach. Color the leaves with Old Olive.
8. Stamp outline and sentiment from Great Friend onto Natural Ivory and cut out along inner dotted line. Stamp outline again on scrap piece of Perfect Plum and cut along outer solid line. Adhere together.
9. Adhere vellum layer and sentiment to Baja Breeze.
10. Wrap a long piece of twine several times around Baja Breeze layer and tie on the left side. Adhere to Perfect Plum card base.

Wednesday, April 29, 2009

May Scrapbook Workshop Projects

Here they are!!! I am super excited to show you how to make these albums at my workshop on May 8! The tall one is a 5 x 7 1/2 accordion album and the small one is a key chain album (more pictures below). They would be great Mother's Day gifts! :) 

There are still spots available so let me know ASAP if you want to sign up! You can either bring pictures with you (I'll email you sizes once you sign up) or just create your layouts and add them later. Both of these were super easy to make and the hardest part was picking out what pictures I wanted to put in them!

Accordion Album Open

Accordion Album Top View

Keychain Album Open

Monday, April 27, 2009

Vellum Spotlight with "Rock & Roll" Butterfly

Well, I decided to fix this one up so that I could share it with you tonight. At first I had just punched the hole in the vellum and the spotlight effect wasn't as dramatic as I was hoping. I really didn't realize that until I went to photograph it and the spotlight didn't show up. I originally was just going to re-do it using vellum the whole way across, getting rid of the spotlight technique, but I'm really glad I decided to put a scallop around it instead because it really makes the spotlight stand out! I wish I had saved the "before" pictures so you could see what I mean.

Anyway, this is the second of my Mother's Day cards. I've actually decided to re-create the "For You" card with the Flowers in Silhouette stamp that I made a few days ago as the third in the set, so I only have one more to go!


Stamps: Great Friend
Paper: Basic Gray, Whisper White, Baja Breeze Cardstock
Ink: Basic Gray, Baja Breeze, Old Olive
Accessories: Vellum, Summer Love Rub Ons, Baja Breeze Striped Ribbon, Twine, 1 3/8 Circle Punch, Scalloped Circle Punch, Corner Rounder Punch

1. Score 4 1/4 x 11 piece of Basic Gray at 5 1/2 and fold on score line.
2. Stamp stems and butterflies on 4 x 5 1/4 piece of Whisper White. The stems are stamped in Old Olive (stamping twice before re-inking) and the butterflies are Basic Gray and Baja Breeze.
3. Cut a piece of vellum to 4 x 5 1/4. Lay over Whisper White to decide where you want to punch your hole for the spotlight effect. Line up your 1 3/8 circle punch and then remove the Whisper White so you are only punching out the vellum.
4. Punch out a scalloped circle ring from Baja Breeze by punching a 1 3/8 circle and then lining the scalloped punch over the punched out hole. Adhere scallop to vellum.
5. Tie knot in Baja Breeze ribbon and adhere around vellum and Whisper White. I also took a small small SMALL amount of Tombow adhesive and dabbed it in the corners to help hold the vellum in place. If you use too much, you can see it, so be cautious.
6. Adhere Whisper White/vellum piece to card base.
7. Ink the butterfly with Baja Breeze and then lightly roll the edges of the stamp in Basic Gray for the rock and roll effect. Stamp the butterfly onto scratch piece of Whisper White. Cut out and adhere to vellum, only placing adhesive down the center so the wings can "fly".
8. Stamp sentiment onto scratch piece of Whisper White and trim down so that it is the size you want. Use corner rounder to round corners. Punch hole in upper left corner.
9. Cut out two of the flowers from the Summer Love Rub Ons and apply to your "tag"
10. Thread twine through hole and tie it around the knot of the Baja Breeze ribbon. Snip off the excess.

I also think I'm going to make this card for my technique workshop on the 15th...depends on what other creations I can come up with. I just like how many techniques you can show with one card....so this could be a sneak peek! :) 

Found It!

Phew! I think I redeemed myself from last night's stamping nightmare. And it was all because Kim, one of my customers and fellow YMCA employee, stopped by to see me today and gave me some of her old cardmaking magazines. I took a peek at one while I ate my lunch and saw a card made with vellum. I've never really experimented with it and actually forgot that I had bought a piece a few months ago. I decided that's what I was going to use on my cards and I busted out two cards in about an hour and half! I'm only sharing one with you today because as I was getting ready to take a picture of the second one I realized I want to change one thing...and I've already put everything away (see how much I miss my attic stamping room!! haha). But I did use my trusty Flower Fancy set just like I said! :) I also used my newest favorite set Great Friend for the sentiment. I've decided it's going to be the sentiment for all of the Mother's Day cards. It felt so good to look at my card and feel good about it...hopefully I don't have another night like last night ever again!

Stamps: Flower Fancy, Great Friend
Paper: Baja Breeze, Perfect Plum, Whisper White Cardstock; Walk in the Park DSP
Ink: Basic Gray
Accessories: Vellum, Stampin' Pastels, Blender Pens, Baja Breeze Ribbon, Brads, Eyelet Punch, Clear Embossing Powder, Embossing Gun, Dimensionals

1. Score 5 1/2 x 8 1/2 piece of Baja Breeze at 4 1/4 and fold on score line.
2. Mat 5 x 3 3/4 piece of DSP to 5 1/4 x 4 piece of Perfect Plum. 
3. Stamp flower onto vellum using Basic Gray and emboss with clear embossing powder. Color with blender pens and Stampin' Pastels. 
4. Cut to 3 x 4 1/4. Tear off bottom of vellum. Punch two holes in the top corners.
5. Lay vellum over 3 x 4 1/4 piece of Perfect Plum and punch holes through cardstock. Attach with brads.
6. Use the eyelet punch on a 4 1/4 x 1 1/2 piece of Baja Breeze and attach to Perfect Plum/vellum piece. Adhere entire piece to DSP.
7. Tie a knot in a piece of Baja Breeze striped ribbon and wrap around all the layers except the card base.
8. Stamp the sentiment and border from the Great Friend set in Basic Gray on Whisper White. Stamp small flower from Flower Fancy using Baja Breeze ink (stamp off once). Cut out at dotted line.
9. Stamp border on Baja Breeze cardstock and cut out along outer line. Adhere to Whisper White sentiment. Adhere to card using dimensionals.

Help Me Find My Mojo!

Ugh...that's all I can say about my evening of stamping last night! First off, I think my "stamping brain" was confused because I'm back to working off the dining room table instead of my little studio in the attic because of the heat, so now everything is stored away until I pull it out. I guess my creativeness works better when everything is set out where I can see it.

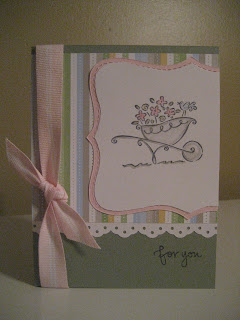
But I got an order for 4 Mother's Day cards yesterday, so I decided to work on those last night instead of my workshop projects since I need to get the Mother's Day cards in the mail to her by the end of the week. Well 3 hours later and this was all I came up with. I don't have any sets that say "Happy Mother's Day" so I was just sort of improvising. I decided to pull out the retired Love Ya Bunches set since I hadn't used it in a while. At first I really liked the wheelbarrow card, but now I'm not sure...that card actually came together really quick and I thought I was on a roll. But when I went to start the next card, I just kept changing my mind and running out of ideas. I wasn't leaving my table until I had SOMETHING, and this is it. It's okay, but not for Mother's Day, and definitely not one of my best...so back to the drawing board! I'm thinking about busting out my tried and true Flower Fancy set! It never lets me down!

Anyway...here are the cards. Let me know what you think...I seriously am disgusted by them! haha I'm going to hit it hard this evening, so hopefully my "Stamping Mojo" returns!

(Sentiment is from the Great Friend set)

Sorry I don't have instructions for these cards...I changed them so many times I would have to go back and re-measure everything to get the measurments. I used Sale-A-Bration DSP on both as well as Sage Shadow for the card bases.

Sunday, April 26, 2009

Jolene's Make-and-Take

As promised, here is the card we made at Jolene's workshop! I think it's super cute. Everyone made either a green or a pink one and I was excited to get green because it's outside of what I would normally choose (I'm a "pinky" haha). I was also nervous about using the wheel. I got one with my kit and still have yet to use it...honestly, it scares me a little! But I was very excited to see how easy it really was to use. The flowers that go up the spine of the card were made using the wheel. I might have to buy some additional wheels with my next order now!

I think Jolene did a great job at her first workshop and everyone's cards looked great! 

Great Friend

I know I said I was going to start working on workshop projects today, but I had to get this one made. This card was made for one of my really great friends at work who did an amazing job with planning our annual Healthy Kid's Day event that was held yesterday. I'm off to Jolene's here in a little, so look for an upload of our make-and-take later today!

Stamps: Great Friend
Paper: Baja Breeze, Cameo Coral, Whisper White Cardstock and Walk in the Park DSP
Ink: Baja Breeze, Basic Gray, Cameo Coral
Accessories: Eyelet Punch, Whisper White Ribbon, Twine, Dimensionals

1. Score 8 1/2 x 5 1/2 piece of Baja Breeze at 4 1/4 and fold along score line.
2. Use the Eyelet Punch on a 1 1/2 x 5 1/4 piece of Whisper White and adhere to 5 1/4 x 2 piece of DSP.
3. Tie Whisper White ribbon around DSP.
4. Stamp the butterfly from Great Friends three times in Baja Breeze. 
5. Adhere DSP to left side of card base.
6. Stamp the outline once onto Whisper White and once onto Cameo Coral using Basic Gray Ink. Stamp the sentiment onto the Whisper White piece using Cameo Coral Ink. Cut out the Cameo Coral cardstock along the outer black line and the Whisper White with the sentiment along the inner dotted line. Adhere the two together. 
7. Punch a hole in the sentiment and lace twine through. Adhere sentiment to DSP using a dimensional.
8. Loop the twine under the ribbon and tie a knot right above the punched hole. Snip off the excess so you are only left with a knot.

Saturday, April 25, 2009

Square Birthday Card

I saw a layout similar to this in the newest issue of the Stampin' Up demonstrator magazine I get each month and decided to try it out. Of course once I got started I changed some things, but I really like how it turned out. I used one of my favorite sets "Crazy for Cupcakes" as I'm using this for one of my customers' birthday. Starting tomorrow I will only be working on samples for my May workshops, so you will be seeing a lot of Walk in the Park DSP and Great Friend/Summer Love Stamps and Rub ons. I also will be going to Jolene's first workshop tomorrow, so I will post our make-and-take too :)

Stamps: Crazy for Cupcakes
Paper: Pink Pirouette, Whisper White, Chocolate Chip, Barely Banana Cardstock; Sweet Always and Sale-A-Bration Designer Series Paper
Ink: Chocolate Chip
Accessories: 1 1/2 inch Circle Punch, 1 inch Circle Punch, Ticket Corner Punch, Big Shot, Scallop Circles #2 Die, Chocolate Chip Ribbon, Liquid Applique, Embossing Gun, Stampin' Pastels, Blender Pens, Dimensionals

1. Score 8 1/2 x 4 1/4 piece of Pink Pirouette Cardstock at 4 1/4 and fold on score line.
2. Cut a 4x4 square of Sweet Always and Sale-A-Bration DSP. Cut one in half diagonally and adhere to the other. 
3. Wrap Chocolate Chip ribbon diagonally across DSP where the two designs meet. Adhere DSP to card base.
4. Run a scrap piece of Pink Pirouette through the Big Shot using the Scallop #2 die. Stamp cupcakes directly onto scallop and color with Stampin' Pastels and Blender Pen.
5. Apply liquid applique to "ice" cupcakes and heat with embossing gun.
6. Adhere to card base. Use a white marker to put dots on each scallop.
7. Cut a piece of Chocolate Chip and tie into a bow. Adhere on top of ribbon line, overlapping scallop.
8. Stamp cupcakes on scrap piece of Whisper White. Color and apply liquid applique. Cut out.
7. Punch a 1 1/2 inch circle from Whisper White and stamp sentiment twice in a circle pattern. Punch a 1 inch circle from Barely Banana and adhere to center of sentiments. Adhere cut out cupcake to center of Barely Banana circle.
8. Cut a 2 x 1 1/8 piece of Chocolate Chip and punch the corners with the ticket corner punch. Adhere to back of circles.
9. Adhere sentiment to bottom left of card using dimensionals.

Friday, April 24, 2009

Flowers in Silhouette

Well it was Christmas at my house today! My newest box of SU goodies came. What all did I get?...more like what DIDN'T I get! haha I was super excited to use the eyelet punch and some of my new paper. I also got everything for my May workshops, so look for those projects within the next week or so.

This card was really easy to make and I'm really pleased with the outcome. I used the Flowers in Silhouette as well as the Great Friend (for the sentiment) Stamp Sets...both of which I got FREE! The Flowers in Silhouette is from the Get Connected Promotion and the Great Friend I got for getting a recruit during Sale-A-Bration! Gotta love SU! It's also hard to tell from this picture, but the corners of the Whisper White are pierced in a "photo corner" sort of way.

Stamps: Flowers in Silhouette, Great Friend
Ink: Bashful Blue, Basic Gray
Paper: Basic Gray, Bashful Blue, Barely Banana, Whisper White Cardstock
Accessories: Eyelet Punch, Twine, Paper Piercer 

1. Score 4 1/4 x 11 piece of Basic Gray cardstock at 5 1/2 and fold on score line.
2. Use eyelet punch on 5 1/4 x 4 piece of Barely Banana and adhere to Basic Gray.
3. Place 5 x 3 1/8 piece of Bashful Blue on top of Barely Banana.
4. Lightly sponge Bashful Blue ink over a 4 3/4 x 2 7/8 piece of Whisper White. Stamp Flowers in Silhouette stamp in Basic Gray, stamping twice before re-inking. Stamp the sentiment from Great Friend in the corner. 
5. Using your paper piercer, pierce 3 holes 1/8 of an inch apart going across and down to form "photo corners" --sorry you can't see this well in the picture.
6. Cut two pieces of twine 6 inches and wrap around Whisper White. Tie a smaller piece around the two.
7. Adhere Whisper White to Bashful Blue. 
8. The inside of the card has a 4 x 5 1/4 piece of Bashful Blue.

Sunday, April 19, 2009

Stationary Box

This might be my most favoritest (is that a word) thing I've made--I say that a lot though! hehe But seriously...I got the idea for this stationary box from Amy Celona's blog and decided it would be a great idea to make one for our Administrative Assistant at work as Wednesday is Administrative Professional Day. It took me about 5 hours to make the whole thing...but that included coming up with how I wanted the cards and notebook to look like--trust me, I changed my mind 5000 times! Not counting "creative" time, it probably only took 3 hours.

Here is a picture of the Stationary Box, along with the matching notebook:


This is what it looks like when first opened:

And the whole kit and caboodle (2 standard size cards with envelopes, 4 little note cards, 4 matching gift tags, a Post-It note holder, and matching pen):

Closeup of the note cards:

Closeup of the gift tags:

Closeup of the Post-It note holder (minus the mini pencil that will go in the little slot on the left) and pen:


Instructions for the box itself can be found here. Instructions for the Post-It note holder can be found here.

Stamps: Fun and Fast Notes, Pocket Silhouettes
Paper: Chocolate Chip, Pink Pirouette, Whisper White Cardstock and Sweet Always Designer Series Paper
Ink: Chocolate Chip
Accessories: Stampin' Pastels, Blender Pen, Ribbon, Junior Legal Pad, Post-Its, Pen

Saturday, April 18, 2009

May Workshop Promotion

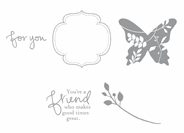
Here are the details on my May Workshop Promotions: If you purchase either the Summer Love Rub Ons 114620 ($11.95 for two sheets) or the Great Friend Stamp Set 113792 ($17.95 set of 5) you will get to attend the classes for $5 each. If you purchase both, you will get to attend one of the classes for free and the other for $5. The great thing about purchasing the rub ons is that at the workshops you won't have to worry that someone will use the image you want because you will have two sheets of your own! 

In order to guarantee delivery prior to the May 8th workshop, the order will need to be placed by April 27. You can either purchase
them yourself by visiting my demonstrator site (they will ship directly to you, so don't forget to bring them) or submit your order andpayment (cash, check, debit/credit card) to me before then -- these would come to me, so I would have them for you the night of the workshop.
Wednesday, April 15, 2009

Crazy for Cupcakes Workshop

Here is a preview of the projects we will be making this weekend at the Crazy for Cupcakes Workshop! There are two 4 1/4 x 5 1/2 cards, one gate fold card, and one treat bag. Enjoy!


Close up of the 3D icing (it looks way better in real life)


Close up of the treat bag

Tuesday, April 14, 2009

New Workshops Added for May

Mark your calendars! 

May 8 - Accordion Coaster Album Workshop ($15; $12 if you bring a friend)

May 15 - Walk in the Park Technique Workshop ($12; $10 if you bring a friend)

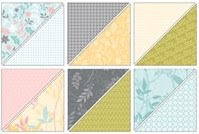
We will be using the Walk in the Park Designer Series Paper along with coordinating stamps and rub ons in both workshops. For more information visit my Stampin' Up Demonstrator Website and email me to sign up!

Also, don't forget that until April 30 for every $40 you spend from the Occasions Mini you get a free item from the Under $10 section of the Idea Book and Catalog!

Sunday, April 12, 2009

Friend to Friend

This card was made for one of my employees who is having trouble with her third pregnancy. I am going to take it in tomorrow for all of the Health & Fitness Staff to sign. Keep her in your thoughts and prayers.

Stamps: Fun and Fast Notes, Pocket Silhouettes
Paper: Not Quite Navy, Apricot Appeal, Whisper White Cardstock and Sale-A-Bration Designer Series Paper
Ink: Basic Black
Accessories: Stampin' Pastels, Blender Pen, Ribbon, Brads, Hole Punch, Dimensionals

1. Score 5 1/2 x 8 piece of Not Quite Navy cardstock at 4 1/4 and fold along score line.
2. Stamp bird from Fun and Fast Notes onto a 3 x 3 piece of Whisper White. Stamp it again onto a scratch piece of paper. Cut out image from scrap paper.
3. Use a piece of tape to temporarily adhere your "scrap" bird over the "good" bird to create a mask. Then stamp the vase of flower image from the same set slightly to the right but allowing some of it to stamp on top of your masked bird. Peel off mask.
4. Stamp sentiment from Pocket Silhouettes in lower right corner.
5. Color images using blender pens and Stampin' Pastels. Use sponge dauber to rub Not Quite Navy pastels around the outer edges of the Whisper White.
6. Mat Whisper White to a 3 1/4 x 3 1/4 piece of Not Quite Navy and then mat that onto a 3 1/2 x 3 1/2 pice of Apricot Appeal.
7. Wrap a piece of Apricot Appeal ribbon around a 2 1/2 x 4 1/2 piece of Designer Series Paper. Use a small piece of the same color ribbon to tie a knot around ribbon strip. Adhere DSP to top left corner of card base.
8. Using dimensionals, adhere matted image to lower right of card base.
9. Punch three holes above image and attach Apricot Appeal brads.
10. The inside was covered with two 4 x 5 1/4 pieces of Apricot Appeal

25th Wedding Anniversary

Happy Easter everyone! I hope you enjoyed time with your friends and family! Today was the first time since I joined Stampin' Up that I used non SU cardstock and ink, but since I needed silver accessories for a "silver anniversary" card and I had some left over paper and ink from Michael's laying around. The cool part about this card is that the ribbon that I used was actually white. Read below to find out how to dye your ribbon!

Stamps: Close as a Memory, Congrats
Paper: Silver, Basic Black, Whisper White Cardstock 
Ink: Silver Craft, Basic Black
Accessories: Clear Embossing Powder, Embossing Gun, Liquid Applique, Ribbon, Corner Rounder, Sponge Dauber

1. Score 4 1/4 x 11 piece of Silver cardstock at 5 1/2. Fold on score line. 
2. Stamp flower from Close as a Memory set using the Silver Craft Ink onto a 3 x 3 1/2 piece of Whisper White cardstock.
3. Emboss with clear embossing powder.
3. Stamp sentiment from Congrats set in Basic Black Ink in bottom right corner of Whisper White. 
4. Cut a 4 inch piece of white ribbon. Dip your sponge dauber in the Basic Black ink and pull ink over white ribbon using long strokes. Do both sides and set aside to dry.
5. Apply liquid applique around the edges of the flowers (it's hard to see in the picture, but it looks really nice in real life). Use heat tool to dry applique and it will puff up.
6. Take dried black ribbon and tie a small knot. Adhere around Whisper White.
7. Mat to a 3 1/4 x 3 3/4 piece of Basic Black cardstock and adhere to silver card base.
8. Stamp sentiment from Congrats set in lower right corner of the card base.
9. For the inside adhere a 4 x 5 1/4 piece of Basic Black to card base. Use corner rounder to round corners of 3 3/4 x 5 piece of Whisper White and adhere to black.

Friday, April 10, 2009

Easter Treats

With this being Easter weekend, I wanted to make a few more projects using the Egg-cellent Easter set before it has to be put away. Since I love to make treat boxes/bags that's what I decided to make. I plan to use them as door prizes at Kim's party tomorrow afternoon.

Nugget Box:


Stamps: An Egg-cellent Easter
Paper: Bashful Blue, Certainly Celery, Whisper White Cardstock and Sale-A-Bration Designer Series Paper
Ink: Chocolate Chip
Accessories: Certainly Celery Ribbon, Stampin' Pastels, 1 3/8 Circle, 1 1/2 Circle, and Scalloped Circle Punches; Blender Pen, Dimensionals

1. For the bottom of the box, score 5 1/4 x 3 3/4 piece of Bashful Blue cardstock at 1/2 and 1 1/8 on all sides.
2. Cut off the three small boxes that make an "L" shape in each corner. On the long side snip along the score line up to the 1 1/8 score line to create little flaps.
3. Apply adhesive to the outer side of the flaps and the inside of the other edges and fold the box together.
4. For the top of the box score 5 1/8 x 3 1/16 piece of Bashful Blue cardstock at 11/16, 2 1/4, 2 15/16, and 4 7/16.
5. Fold on the score lines around the box and adhere ends together. (If you don't fold it around the box before adhering, you might make it too tight for the box to fit inside.
6. For the nuggets, wrap 1 x 3 piece of Designer Series Paper around each candy piece.
7. Decorate box as desired.

Top Note Treat:

Stamps: An Egg-cellent Easter
Paper: Bashful Blue, Certainly Celery, Apricot Appeal, Whisper White Cardstock and Sale-A-Bration Designer Series Paper
Ink: Chocolate Chip
Accessories: Apricot Appeal Ribbon; Stampin' Pastels; 1 3/8 Circle, 1 1/2 Circle, and Scalloped Circle Punches; Big Shot; Top Note Die; Blender Pen; Dimensionals; Medium Cellophane Bags

1. Send scrap piece of Certainly Celery cardstock and Designer Series paper through the Big Shot machine using the Top Note Die.
2. Fold both Top Note pieces in half. Cut DSP Top Note in half. Stamp sentiment in top right corner.
3. Wrap Apricot Appeal ribbon around DSP and adhere.
4. Fill medium cello bag with wrapped nuggets. Fold bag to close and place inside the folded Certainly Celery Top Note.
5. Staple bag to Top Note making sure that the front of the staple is in the back and that the prongy side comes out the front.
6. Adhere DSP Top Note with ribbon to the bottom half of the Certainly Celery Top Note covering the staples.
7. Decorate as desired.

Pop Up Birthday Card

Wow! That's all I can say about the new pop up dies from Stampin' Up! I told you that Kathy had given us a Take-N-Make of the new pop up birthday cake on Wednesday and I had so much fun putting it together! I kept the front pretty simple since the inside really takes the cake (haha). The only thing I wish I would have done differently was paid some attention to where the seams on the cake were because I tied my ribbon and glued my candles on the seam side. I didn't realize until after everything was glued in place and didn't want to mess around with trying to switch it. The die also comes with little bride and groom cut outs, so this could be made into a wedding cake also.


This pop up die, along with the other amazing dies exclusive to Stampin' Up, require the use of the Big Shot die cutting machine. For more information, or to purchase the Big Shot and/or the dies, visit my Stampin' Up store link on the right hand side.

Wedding Invitations

As I mentioned before, I have recently finished a set of wedding invitations for some friends from college. Well they are back in town for Easter and are meeting to pick them up tomorrow. I'm really excited for them to see the invites in person! Here are some pictures of the finished product! Included in their set is a book fold invitation, response card with envelope, directions card, and outer mailing envelope. (Supplies are non-SU)

The front:


The inside:


All boxed and ready to go:
Click here for more wedding invitation samples!

Wednesday, April 8, 2009

Meeting Swaps

Tonight was Kathy's (my up-upline) monthly downline meeting and I wanted to share with you some of the swaps I received tonight. We have such a talented group and I couldn't wait to participate in this swap! The names of the creators are included on those who put their information with their cards (I can see the rest of your faces when I look at your cards, but just don't know everyone's name yet...I'm sorry!). Kathy also gave us a Take-N-Make of the new Big Shot Pop Up Birthday Cake Die, so I will be posting that once I sit down and put it together.

I also got to meet my downline, Jolene, tonight and she is awesome! I couldn't ask for a more fun and easy going person and I'm really looking forward to helping her with her first workshop! For receiving a recruit, I was awarded a honey bee pin with a pearl (you get a new pearl with each of your recruits) as well as a $10 Stampin' Up gift certificate! I can't believe how much I love being a demo! :)

Creator: Roberta Nahas (She made these specially for Jolene and I...there was candy in it, but it didn't last very long! Sooooo cute!)

Creator: Sue Millenbaugh (I lucked out and got one of Sue's notebooks that she had leftover from last month's swap...isn't this awesome?!)


Creator: Sue Bell


Creator: Cindy Mawhinney


Creator: Sue Millenbaugh


Creator: Kathy Stone

Creator: JoAnn Stone

Creator: Paula Phillips


Tuesday, April 7, 2009

Hostess Gift

I'm getting very excited about Kim's party this weekend! I decided to make her a stamped candle and matching gift box using the stamp set that we will be using on Saturday, Flower Fancy (hopefully she doesn't see this first! lol). The candle fits perfectly inside this little box and was very easy to make! I'm not sure if I'm totally happy with the candle yet or not. I might go back and add some leaves or branches to fill in some of the empty spots.

Stamps: Flower Fancy
Paper: Always Artichoke, Apricot Appeal, Very Vanilla Cardstock and Sale-A-Bration Designer Series Paper
Ink: Chocolate Chip, More Mustard, Certainly Celery
Accessories: Apricot Appeal Ribbon, Stampin' Pastels, Blender Pens, Embossing Gun, Wax Paper, Tissue Paper

For the stamped candle:

1. Stamp images from Flower Fancy (both parts of the 2-step stamp) onto tissue paper. Cut image out--it's okay to leave a little tissue paper around the image.
2. Position tissue paper on candle. Wrap a strip of wax paper the height of your candle around the candle sandwiching the tissue paper in between.
3. Heat up your embossing gun for 30 seconds and then heat over the image. You will notice it melt to the candle.
4. Carefully peel off the wax paper to reveal your image. Repeat until you have desired design.

The tutorial for the box can be found here. I altered the dimensions to fit my candle.

Monday, April 6, 2009

Hoppy Easter Shaker Card

This was definitely one of the most fun cards to make...and play with when it was done! It's almost like a snow globe card! They are made using the excess rubber from your stamps. And since you can only make one per stamp (unless you have multiples of the same set), you'll want to make sure to give it to someone extra special! 

(Close up after being shaken)

Stamps: An Eggcellent Easter
Paper: Close to Cocoa, Pretty in Pink, Whisper White Cardstock and Sweet Always Designer Series Paper
Ink: Chocolate Chip
Accessories: Stampin' Pastels, Blender Pens, Scalloped Circle, 1 1/2 Circle, and 1 3/8 Circle Punches; Pink Pirouette Striped Grosgrain Ribbon, Dazzling Diamonds Glitter, Acetate

The tutorial to make a shaker card can be found here. This is from Meg Loven, who is a few uplines up from me (if that makes sense lol). I have read her blog daily for many months and couldn't believe I was part of her downline when I signed up as a demonstrator!
 

Sunday, April 5, 2009

Baby Wipe Technique

This card was made using the baby wipe technique. It's very easy and gives a unique look. (You'll have to excuse my fuzzy photo. Our camera battery was really low, but I didn't want to wait for it to charge to post this! haha)

Stamps: Close as a Memory
Paper: Not Quite Navy, Old Olive, Whisper White, Apricot Appeal Cardstock
Ink: Tempting Turquoise and Kiwi Kiss Re-inkers, Versamark
Accessories: Apricot Appeal Ribbon, Baby Wipe

1. Score 5 1/2 x 8 Not Quite Navy Cardstock at 4 1/4 and fold on line.
2. Fold a baby wipe in half and drop ink from re-inkers in random pattern big enough to use as a stamp pad for the stamp.
3. Stamp image from Close as a Memory onto 2 1/2 x 3 piece of Whisper White cardstock, using ink from baby wipe.
4. Adhere only the top part of the image to 2 3/4 x 3 1/4 piece of Old Olive. Tear both pieces along the bottom.
5. Slide a 4 inch piece of Apricot Appeal ribbon between the layers and adhere to back on one side. Cut the other side at an angle. Adhere the bottom portion of the Whisper White to the Old Olive.
6. Stamp the image and sentiment from Close as a Memory onto card base using Versamark ink. 
7. Adhere image to top left corner.
8. For the inside, adhere a 4 x 5 1/4 piece of Apricot Appeal cardstock to card base.
 

Saturday, April 4, 2009

Acrylic Frame Post-It Holder


This is a Post-It holder I made for my desk at work. I also plan to make something similar for our Administrative Assistant at work for Administrative Professional's Day on April 22. They are a super easy (and cheap--the frame was $1 at Family Dollar) way to spice up your office!

Stamps: Pocket Silhouettes, Heard From the Heart
Paper: Whisper White, Bashful Blue, Apricot Appeal, Certainly Celery Cardstock and Sale-A-Bration Designer Series Paper
Ink: Chocolate Chip, Bashful Blue, Certainly Celery
Accessories: Bashful Blue and Certainly Celery Ribbon, Corner Rounder, Post-It, Binder Clip, Acrylic Frame

*These are the dimensions for a 5x7 frame, but can be altered to fit any size frame

1. Stamp Pocket Silhouettes with Bashful Blue and Certainly Celery ink onto the bottom of a 4 1/2 x 2 1/2 piece of Whisper White Cardstock. Stamp sentiment from Heard From the Heart with Chocolate Chip ink on top.
2. Use corner rounder to create scalloped border on 4 1/2 x 1 piece of Bashful Blue. Adhere to white cardstock. 
3. Wrap Certainly Celery ribbon where the white and blue meet and adhere to back. 
4. Adhere stamped piece to 5 x 7 piece of Sale-A-Bration DSP.
5. Adhere 3 1/4 square piece of Certainly Celery to 3 1/2 square piece of Apricot Appeal and adhere to bottom of DSP.
6. Slide DSP into frame so that the stand is at the top. 
7. Tie a small piece of Certainly Celery and Bashful Blue ribbon into a knot and adhere directly onto frame overtop of the Certainly Celery ribbon. Adhere Post-Its in the center of the Certainly Celery square.
8. Adhere 3/4 square of Certainly Celery cardstock to top of binder clip and clip onto frame.